In 2026, WordPress stands tall as the world’s most popular website platform, powering over 43% of all websites across the globe. Its unmatched combination of ease, flexibility, and scalability has made it the go-to choice for businesses, entrepreneurs, and individuals seeking a reliable digital presence.
If you’ve ever wanted to launch a professional wordpress website for your blog, portfolio, or e-commerce venture, you’re in the right place. This step-by-step guide is designed to be jargon-free and accessible, no matter your experience level.
Follow along and you’ll gain the confidence to create a fully functional, optimised site that stands out online. We’ll guide you through every stage, from planning and choosing hosting, to installing WordPress, designing your site, adding features, optimising for SEO, and launching with impact.
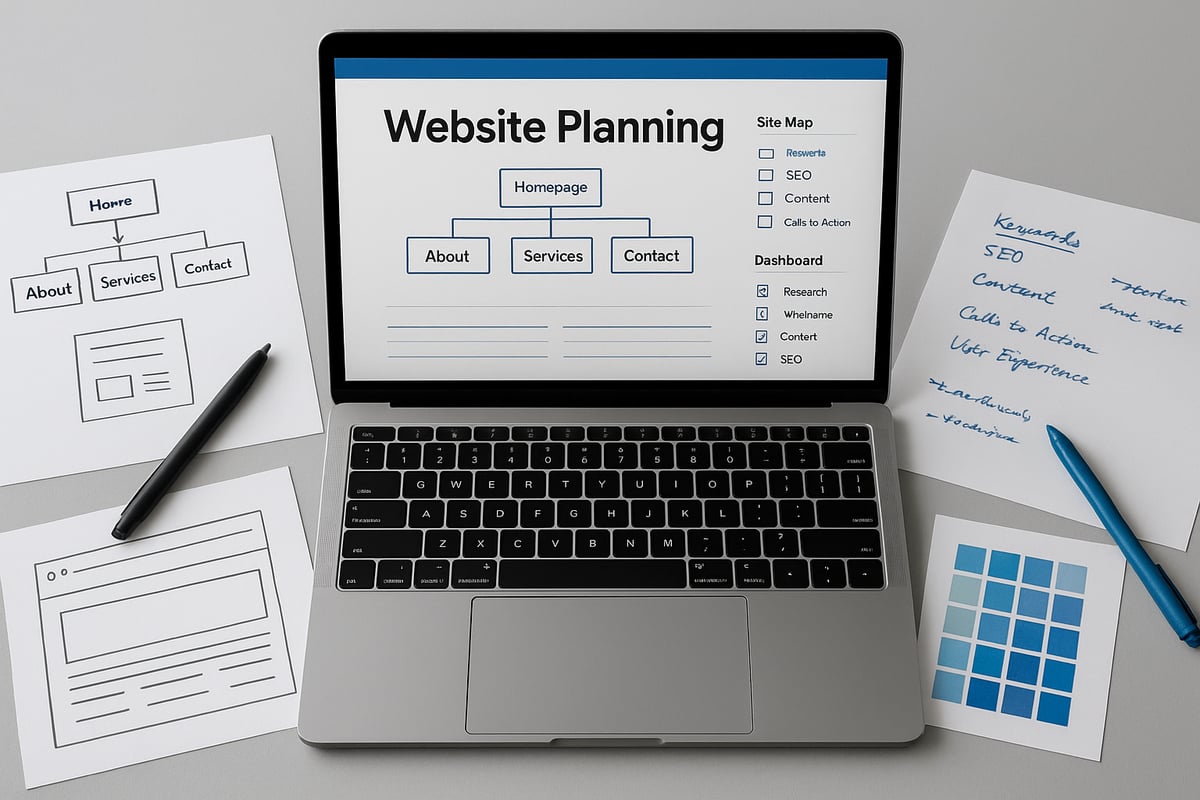
Step 1: Planning Your WordPress Website
Launching a successful wordpress website starts with a robust plan. Before you dive into design or development, clear planning ensures your site meets real goals, serves your audience, and supports your long-term vision.
Defining Your Website Goals and Audience
The first step in planning a wordpress website is clarifying its purpose. Are you building for business, blogging, a creative portfolio, e-commerce, or a personal project? Each website type serves a different aim, so be specific.
Next, identify your target audience. Consider their age, interests, location, and what problems your site will solve for them. For example, a local trades-business seeking more service enquiries must appeal to homeowners in its area.
Align your site features with your business objectives. Want to generate leads, boost sales, or grow newsletter sign-ups? Set measurable goals from the start. Most successful sites begin with clear user personas and well-defined outcomes.
Taking time to plan now saves costly redesigns down the road and ensures your wordpress website delivers real value.
Mapping Out Site Structure and Content
A well-organised wordpress website starts with a solid site structure. List your main pages: Home, About, Services, Blog, Contact, and any other key sections. Think about how visitors will navigate from page to page, ensuring their journey is smooth and logical.
Create a simple sitemap or use mind mapping tools for clarity. For e-commerce, include product categories, checkout, and account pages. Make a list of essential content for every page, such as service details, testimonials, or FAQs.
A comprehensive guide to the critical aspects of business websites can help you ensure nothing important is missed in your planning. Well-structured sites not only improve user retention but also boost SEO, making your wordpress website more discoverable.
Researching Competitors and Inspiration
Exploring other websites is invaluable when planning your own wordpress website. Analyse top competitors for features, layout, and user experience. What strengths make their sites effective? Where do they fall short?
Seek inspiration from award-winning WordPress examples and theme showcases. Take note of layout styles, colour schemes, and calls-to-action that stand out. Comparing approaches can reveal what works best in your industry.
Modern, intuitive design leads to higher engagement. By gathering inspiration, you avoid the “blank canvas” problem and start your wordpress website project with clear direction and creative ideas.
Deciding on Budget and Resources
Every wordpress website project needs a realistic budget and resource plan. Consider the main costs: domain registration, hosting, premium themes or plugins, and possible professional help. Factor in ongoing expenses for updates and support.
Estimate your time investment. Will you build it yourself or hire experts? A small business might budget £500–£2000 for a basic site, while larger projects need more. Reputable agencies often include 12 months of support in their packages.
Budgeting upfront helps prevent overspending and delays, ensuring your wordpress website is launched on time and within your means.
Choosing DIY vs. Professional Help
Decide early if you’ll create your wordpress website yourself or seek professional assistance. Assess your technical skills and how much time you can dedicate. Building your own site offers flexibility and cost savings but requires learning and regular maintenance.
Hiring a digital agency brings expertise, especially important for complex, e-commerce, or SEO-driven sites. Data shows that 60 percent of SMEs outsource website builds for better results. Some agencies now offer hybrid models, combining DIY with expert support.
The right choice ensures your wordpress website meets your needs, whether you value hands-on control or professional peace of mind.
Step 2: Choosing Hosting and Domain Name
Choosing the right hosting and domain name is a foundational step for your wordpress website. Your decisions here will affect performance, reliability, and long-term growth. Let us explore each aspect in detail to ensure your wordpress website gets the best possible start.
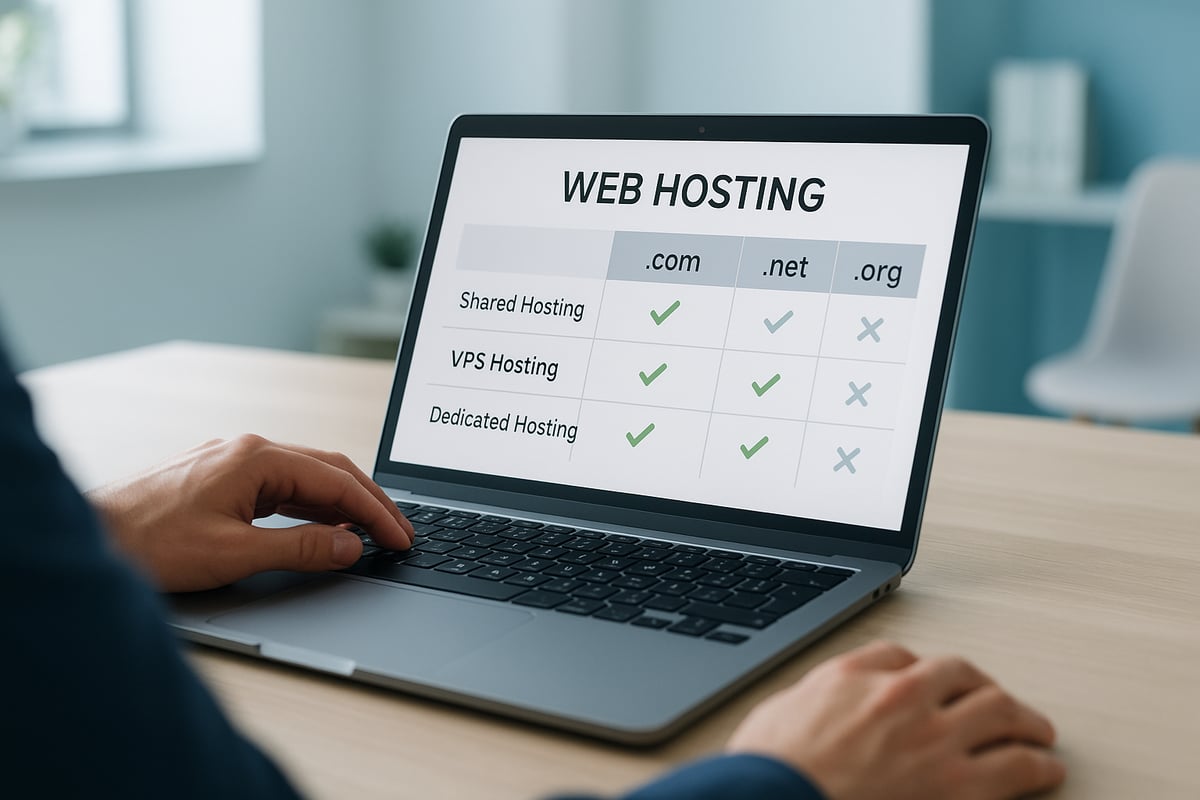
Understanding WordPress Hosting Options in 2026
When launching a wordpress website, your choice of hosting will determine the speed, security, and scalability of your site. There are several main types to consider:
| Hosting Type | Pros | Cons |
|---|---|---|
| Shared Hosting | Affordable, beginner-friendly | Slower, less secure |
| Managed WordPress | Optimised, secure, support | Higher cost, less control |
| VPS Hosting | Flexible, scalable | More technical setup |
| Cloud Hosting | Reliable, scalable | Varies by provider |
For most new wordpress website owners, managed WordPress hosting is the ideal balance. It includes automatic updates, daily backups, and enhanced security. According to Managed WordPress hosting options in 2025, managed providers offer reliable performance and reduce downtime or technical headaches. Your hosting choice will also impact your site's SEO and user experience, so take time to compare options.
Selecting and Registering Your Domain Name
Your domain name is the digital address for your wordpress website. Choose something memorable, short, and easy to spell. Aim for a .com or .co.uk extension for credibility, though niche TLDs are also gaining popularity in 2026.
Begin by brainstorming names that reflect your brand or services. Use domain registrar tools to check availability. Once you find a suitable name, register it promptly to avoid losing it. Many hosting companies offer free domain registration with hosting packages. Remember, a keyword-rich domain can help your wordpress website stand out in search results. Always enable domain privacy to protect your personal details.
Setting Up Hosting and Connecting Your Domain
After selecting your hosting plan and domain, it is time to link them. Most providers offer a simple step-by-step process. Purchase your hosting, then access your domain's DNS settings. Update the nameservers to point to your hosting provider.
Here is a basic outline:
- Buy your hosting package.
- Log in to your domain registrar.
- Locate DNS settings.
- Enter your hosting provider's nameservers.
- Save and allow changes to propagate.
Most hosts support one-click WordPress installation, making it easy to get your wordpress website online quickly. A correct setup ensures your site is accessible, reliable, and ready for visitors.
Evaluating Hosting Security and Support
Security and support are vital for any wordpress website. Look for hosting that includes SSL certificates, firewalls, DDoS protection, and regular backups. These features protect your site from common threats and data loss.
24/7 customer support is essential, especially if you are new to managing a wordpress website. Check if your host offers live chat, phone, or ticket-based help. Strong security and responsive support reduce risks and give you peace of mind. Remember, investing in secure hosting is a smart move for long-term success.
Step 3: Installing WordPress and Initial Setup
Setting up your wordpress website begins with a smooth installation and correct initial configuration. These steps are crucial to ensure your site is secure, optimised, and ready for visitors. Let’s break down each stage, so you can confidently move forward.
Installing WordPress: One-Click and Manual Methods
When launching a new wordpress website, you can choose between one-click installation and manual setup. Most hosting providers in 2026 offer one-click installers like Softaculous or direct WordPress.com setup, making the process fast and beginner-friendly.
| Method | Difficulty | Speed | Best For |
|---|---|---|---|
| One-Click | Easy | Fast | Beginners, most users |
| Manual | Moderate | Slower | Advanced users |
Manual installation gives more control, such as custom file structures or advanced configurations, but requires uploading files and creating databases. For most, one-click is recommended to avoid technical hurdles.
Configuring Essential WordPress Settings
After installation, configure your wordpress website’s basic settings. Start by setting your site title and tagline to reflect your brand. Adjust your timezone to match your location for accurate scheduling.
For SEO, set your permalinks to “Post Name” via Settings > Permalinks, which creates clean, user-friendly URLs like yourdomain.com/sample-post. This structure helps search engines understand your content and reduces future SEO fixes.
During development, temporarily disable search engine visibility in Settings > Reading to prevent search engines from indexing unfinished pages. These early tweaks make your wordpress website easier to manage and optimise later.
Installing SSL and Basic Security Measures
Securing your wordpress website is essential for trust and search rankings. Install a free SSL certificate, which most hosts provide, to enable HTTPS. This encrypts data between your visitors and your site, increasing trust.
Add a security plugin such as Wordfence or Sucuri for firewall and malware protection. Enable automatic updates for WordPress core, themes, and plugins to patch vulnerabilities quickly.
For further security guidance, refer to WordPress security best practices, which outlines essential steps to keep your site safe. Proactive security at this stage protects your wordpress website from common threats.
Creating Essential User Accounts and Roles
Set up user accounts with appropriate roles on your wordpress website. Assign the Administrator role only to trusted individuals, as this grants full control. Use Editor, Author, and Contributor roles for team members who create or manage content.
- Administrator: Full site control
- Editor: Manage content and users
- Author: Publish and manage own posts
- Contributor: Submit posts for review
Enforce strong passwords and activate two-factor authentication for all accounts. Limit admin access to reduce risk, and regularly review user permissions. Careful user management ensures your wordpress website remains secure and organised.
Step 4: Designing Your WordPress Website
Designing your wordpress website is a crucial step that defines your brand's online presence, user experience, and long-term success. Each design decision, from theme selection to visual storytelling, impacts how visitors perceive your site and interact with your content. In this section, we will guide you through essential design elements, practical tools, and expert tips to help you create a visually stunning, functional wordpress website tailored to your goals.
Choosing and Installing a WordPress Theme
Selecting the right theme is the foundation of your wordpress website's look and feel. Start by browsing the WordPress.com theme showcase or reputable marketplaces to compare free and premium options. Prioritise themes that are responsive, fast-loading, and offer extensive customisation. Look for features such as built-in SEO, accessibility, and ongoing developer support.
Key factors to consider:
- Responsiveness across devices
- Speed and lightweight code
- Customisation options for layouts, colours, and fonts
- Regular updates and support
Modern users expect fast, attractive websites, so a well-chosen theme helps your wordpress website stand out from the competition.
Customising Theme Layout and Branding
Once you have installed your theme, use the WordPress Customiser and block editor (Gutenberg) to personalise layouts and align your wordpress website with your brand identity. Upload your logo, choose brand colours, and select fonts that reflect your style. Add high-quality imagery and banners to create a consistent visual experience.
Customisation tips:
- Use drag-and-drop tools for easy changes
- Apply brand colours to buttons and headings
- Maintain consistent font choices throughout the site
Consistent branding across every page helps your wordpress website become memorable and builds trust with your audience.
Building Key Pages: Home, About, Services, Blog, Contact
Create the essential pages for your wordpress website by structuring information clearly and guiding visitors towards action. Begin with a compelling homepage that introduces your brand, followed by an About page sharing your story and values. Service or product pages should highlight your offerings, including testimonials and frequently asked questions.
Key pages to include:
- Home: Introduction and main call-to-action
- About: Background and mission
- Services/Products: Detailed descriptions and benefits
- Blog: Articles, news, and updates
- Contact: Enquiry form and contact details
By planning and building these pages, your wordpress website will provide a seamless and engaging user journey.
Adding Navigation Menus and Widgets
Navigation menus are vital for user experience on your wordpress website. Set up clear header and footer menus to help visitors find key pages easily. Use the menu editor to organise items logically, grouping similar content together. Add widgets to sidebars or footers, such as search bars, social media links, and recent posts, to enhance navigation and engagement.
Best practices for navigation:
- Limit main menu items to seven or fewer
- Use descriptive labels for clarity
- Ensure menus are accessible on mobile devices
A well-organised navigation system encourages visitors to explore your wordpress website further and reduces bounce rates.
Optimising for Mobile and Accessibility
With over 60% of web traffic coming from mobile devices in 2026, your wordpress website must deliver a flawless experience on every screen size. Test your site using theme previews and online tools to ensure layouts adapt smoothly. Add alt text to images, use ARIA labels, and provide keyboard-friendly navigation for accessibility.
Accessibility checklist:
- Responsive layouts for all devices
- Alt text for every image
- High contrast between text and background
- Clear, readable font sizes
By prioritising mobile optimisation and accessibility, your wordpress website reaches a wider audience and achieves better search rankings.
Enhancing Visual Appeal with Images and Video
Captivating visuals are essential for engaging visitors on your wordpress website. Source high-quality, copyright-free images and videos from reputable libraries. Optimise media files using formats like WebP and compression tools to maintain fast loading speeds without sacrificing quality. Use hero images, background videos, and galleries to tell your story visually.
Visual enhancement tips:
- Choose images that reflect your brand and message
- Compress files to improve site speed
- Add captions for context and engagement
Relevant visuals make your wordpress website more memorable and increase user interaction.
Why Partner with a Professional Agency?
Expert agencies like Ruff Idea deliver bespoke wordpress website designs tailored to your brand and business goals. By partnering with professionals, you benefit from integrated SEO, mobile optimisation, and ongoing support. Agencies handle technical setup, security, and performance monitoring, freeing you to focus on your business.

For example, Ruff Idea offers 12 months of support, daily backups, and emergency restoration for every wordpress website they launch. Professionally designed sites consistently outperform DIY builds in conversions and search rankings. Working with a local expert ensures your wordpress website not only looks impressive but delivers measurable results for your organisation.
Step 5: Adding Functionality with Plugins and Integrations
Enhancing your wordpress website with plugins and integrations is essential for a modern, high-performing site. Plugins allow you to add features without coding, enabling everything from SEO to advanced security. Integrations connect your site with external tools, helping you automate tasks and grow your online presence. Choosing the right mix will ensure your wordpress website delivers a seamless experience for both you and your visitors.
Must-Have Plugins for 2026 Websites
Selecting the best plugins is crucial for any wordpress website. Start with essentials that cover SEO, security, caching, backups, and contact forms. Popular choices in 2026 include Yoast SEO for search optimisation, Wordfence for security, WPForms for user-friendly forms, and UpdraftPlus for automated backups. Remember, too many plugins can slow your wordpress website, so only add what you truly need.
- SEO: Yoast SEO, All in One SEO
- Security: Wordfence, Sucuri
- Caching: WP Super Cache, W3 Total Cache
- Backups: UpdraftPlus, Jetpack Backups
- Forms: WPForms, Gravity Forms
Choosing carefully will keep your wordpress website running smoothly and efficiently.
Integrating E-Commerce Capabilities (if needed)
For those planning to sell online, integrating e-commerce features transforms your wordpress website into a full online shop. WooCommerce remains the leading solution in 2026, letting you manage products, payments, and shipping with ease. You can also explore niche plugins for bookings or digital downloads. For more insights on design and optimisation, see these e-commerce web design strategies.
- WooCommerce: Robust, scalable, and widely supported
- Payment gateways: Stripe, PayPal, local options
- Shipping: Table rate, real-time calculators
- Marketing: Abandoned cart recovery, discount codes
E-commerce integration future-proofs your wordpress website for business growth.
Connecting Social Media and Marketing Tools
To maximise reach, connect your wordpress website with social media and marketing platforms. Use plugins to add sharing buttons, display social feeds, and automate blog posting to networks like Facebook, Instagram, and X. Integrate email marketing with tools such as Mailchimp or HubSpot for newsletters and lead capture.
- Social sharing: AddToAny, Social Snap
- Social feeds: Smash Balloon, Spotlight
- Email marketing: Mailchimp for WordPress, HubSpot
- Analytics: Google Analytics, Jetpack Stats
These integrations make your wordpress website a hub for your digital marketing efforts.
Enhancing Site Performance and Speed
A fast wordpress website keeps visitors engaged and boosts SEO. Use caching plugins, image optimisation tools, and content delivery networks (CDNs) to cut load times. Tools like Google PageSpeed Insights help you spot issues. You can also refer to this detailed website speed optimisation guide for actionable tips.
- Caching: WP Rocket, LiteSpeed Cache
- Image optimisation: Smush, ShortPixel
- CDN: Cloudflare, BunnyCDN
- Lazy loading: Native WordPress or plugins
Regular speed checks will ensure your wordpress website remains competitive.
Ensuring Security and Regular Backups
Protecting your wordpress website is non-negotiable. Set up automated backups to safeguard your content and install security plugins to monitor for threats. Limit admin access, use strong passwords, and enable two-factor authentication. For ongoing advice, explore these WordPress website support tips.
- Backups: Schedule daily or weekly
- Security: Enable firewalls and malware scanning
- Access: Restrict to trusted users
- Updates: Keep plugins and themes current
Consistent maintenance keeps your wordpress website safe and resilient.
Step 6: SEO Optimisation and Preparing for Launch
Launching a wordpress website in 2026 means standing out in a competitive digital world. Effective SEO optimisation and thorough pre-launch preparation make all the difference between a site that thrives and one that gets overlooked. Let’s walk through the final steps to ensure your wordpress website is ready for maximum visibility and engagement.
On-Page SEO Best Practices in 2026
Optimising your wordpress website for search engines begins with on-page SEO. Focus on crafting clear, keyword-rich titles and meta descriptions for every page. Use headers to break up content and include your target keywords naturally. Internal linking between your pages helps search engines understand your site structure, while structured data (schema) ensures your content is easy to index.
Consider the following SEO checklist:
| SEO Element | Action |
|---|---|
| Titles & Meta | Add target keywords |
| Headers (H1, H2, H3) | Use logical hierarchy |
| Internal Links | Link related content |
| Schema Markup | Add structured data |
Laying strong SEO foundations before launching your wordpress website is easier than retrofitting them later. For more insights, see how WordPress powers 43.4% of all websites, making SEO a crucial investment.
Creating and Submitting Sitemaps
A sitemap helps search engines crawl your wordpress website efficiently. Use an SEO plugin to generate an XML sitemap automatically. Submit this sitemap to Google Search Console and Bing Webmaster Tools to speed up the indexing process. WordPress in 2026 typically includes built-in sitemap functionality, but plugins like Yoast SEO offer more control.
Follow these steps:
- Generate your sitemap with a plugin or built-in tool
- Log in to Google Search Console
- Locate the Sitemaps section and submit your sitemap URL
Having an up-to-date sitemap ensures every page of your wordpress website is discoverable, helping you appear in search results faster.
Setting Up Analytics and Tracking
Understanding how visitors interact with your wordpress website is essential for ongoing growth. Set up Google Analytics 4 to monitor traffic, user behaviour, and conversions. Google Search Console provides insights into your site’s visibility and any issues in search results.
Install your tracking code using a plugin or manually through the site’s header. Use analytics data to:
- Identify your most popular content
- Track visitor sources and devices
- Measure conversion rates for goals like sign-ups or sales
With analytics in place, you can make informed decisions to improve your wordpress website over time.
Testing Website Functionality and Responsiveness
Before launching, test every feature of your wordpress website. Click all links, fill in forms, and check interactive elements like sliders or buttons. Use multiple browsers and devices to ensure your site looks and works consistently for every visitor.
Consider these steps:
- Test navigation menus and internal links
- Submit forms and check confirmation messages
- Preview your site on mobiles and tablets
A fully tested wordpress website reduces the risk of negative first impressions and encourages visitors to return.
Building Pre-Launch Buzz and Readiness Checklist
Generate excitement for your new wordpress website by announcing the launch on social media and to your email list. Offer incentives, such as early access or exclusive content, to encourage first visits. Create a final checklist covering backups, security, SEO, and a full content review.
Your pre-launch checklist might include:
- Announcing the launch date online
- Testing all security plugins and backups
- Final SEO review using your chosen tools
Building anticipation ensures your wordpress website attracts visitors from day one. For more on why this matters, explore the latest WordPress usage statistics and trends.
After following this step by step guide, you’ll see just how straightforward it can be to build a professional WordPress website, whether you’re aiming for a standout portfolio, an engaging blog, or a high performing e commerce site. If you want your site to stand out and drive results—backed by seamless design, robust SEO, and ongoing support—let’s talk about how we can help you reach your goals faster. You don’t have to do it alone. We’re here to make your vision a reality. Get in touch